
Building a Wooden Lobster Boat
John’s Bay Boat Company, Part II
Peter Kass has had a life-long interest in wooden boats. Kass still builds one boat at a time. The building methods might be called improved traditional. Some of his crew have been with him for decades.
This photo essay highlights some of the steps in an ages-old building process, requiring high level skills in engineering, intuition, architecture, materials, tools, and practice.
Thanks to Walt Barrows, a photographer and admirer of Kass’s work, for granting the use of his photos. The boat in the photos was built in the winter of 2014-2015.

The first mold in place on the keel. Measurements taken off the keel (aft) position it properly.
The wood braces from the upper left and right sides of the mold to the keel are nailed to hold the mold in place.
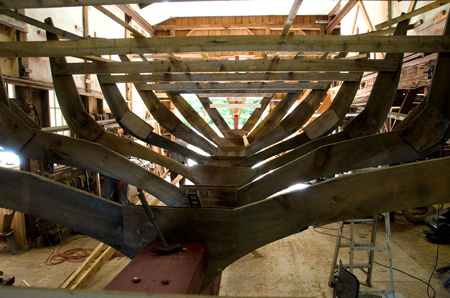
The first seven of the twelve molds tacked in place. On this 46 footer they are about 40" apart. The keel is set up to sit as it would in the water. The waterline will then be level. The molds are squared to the keel and then made plumb.
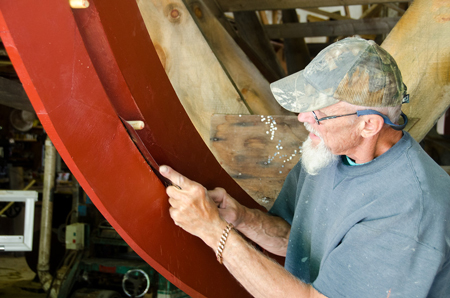
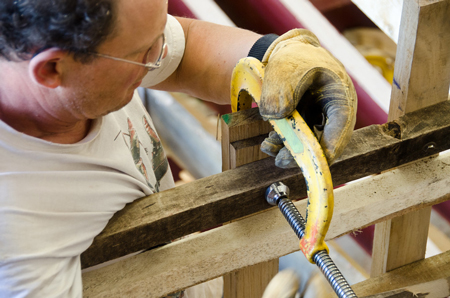
An important detail in a wooden boat are stop waters. These white cedar dowels are driven though holes wherever a keel seam, the joint between two parts of the keel, crosses the rabbet, the notch into which the hull’s planks are set. The stop waters swell to block passage of water through the keel seam into the boat. The line of the keel seam may be visible here at a steep angle to the left of the white stop waters being sawn flush with the rabbet.
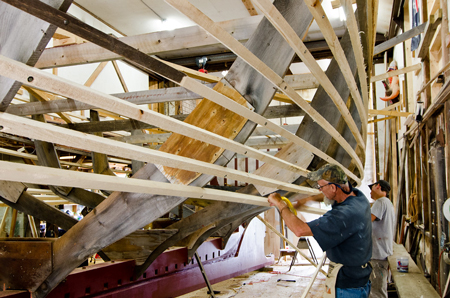
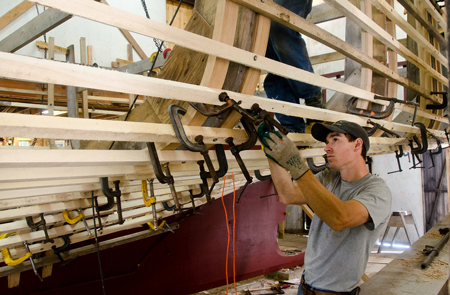
After all the molds are in place, ribbands are screwed to the molds to create a surface against which the ribs of the hull will be bent. The molds and the ribbands together are the form the hull will take it’s shape from. After the ribs are bent in to place, the ribbands are gradually removed as the planking is done.
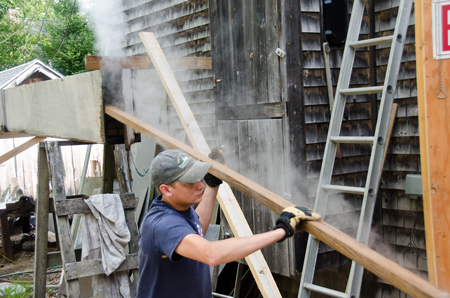
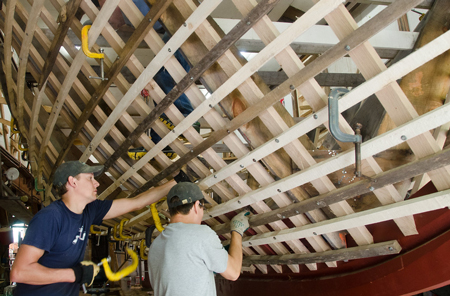
White oak ribs, 1-1/2" x 2-1/2", are heated for two hours in a steam box until pliable. Hustling them to the installation point before they cool is important.
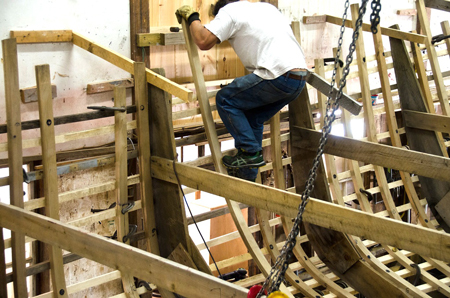
The lower end of the hot rib is driven into the pocket slot in the keel. Standing on the rib and pulling down on the end presses it against the lower ribbands first while it is being clamped to the ribbands.
While one crew member forces down the hot rib from the inside (above), Jeff Hanley clamps the rib to a ribband.
Ribs bent into a tight radius are split for half their upper length. The difference between the inner and outer radius is visible in the the ends of the two halves being clamped to a ribband. This technique avoids stress cracks in the rib later.
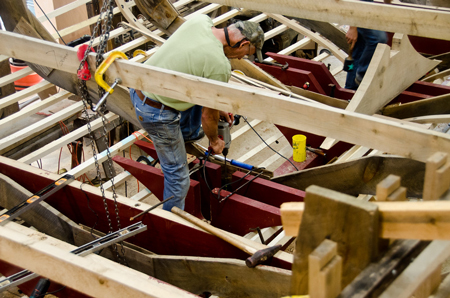
Several floors (dark red), each a unique shape based on the shape of the hull section, are attached to the keel.
Here Sam Jones is drilling holes for driving metal drift pins that fasten the floor to the keel. Later planks will be fastened to the lower edges of the floors. The shaft passes though the floor being drilled. The two floors under Sam,
the two in front of him with cutouts for the engine and the one behind him will carry the two parallel 14' x 4-1/2" x 7"
white oak engine beds.
Andy Dickens, left and Jeff Hanley in the final stages of getting the molds,
ribbands and ribs in place before planking begins.
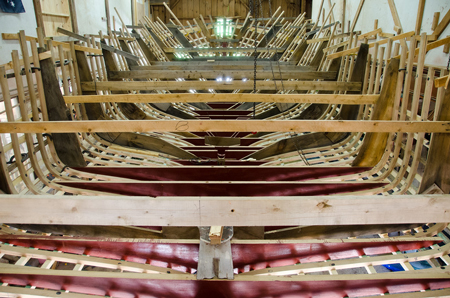
At this angle the only part of the keel visible now is the stem in the background. The molds, ribbands, ribs and red floors are all in position. Note the stabilizer braces nailed to the molds and the walls left and right.
P.S. The boat yard dog at John’s Bay Boat Company noted that her name was misquoted in Part I. It is Phoebe, not Fifi !!